Hey guys, the release of my upcoming Canon 600EX-RT Speedlite Basics class is right around the corner and I’m getting excited! I can’t wait to share with you how easy this speedlite system is to use and how truly amazing it is. It’s a game changer in so many ways and I’ll cover them all. I’ll walk you through the buttons, dials, menus; teach you how to set up wireless communication between the camera and off camera speedlites; work with ETTL and manual; set up groups; share my must-have tips and techniques and sure fire lighting patterns; explain why you need artificial light in your bag of tricks; teach you how to use and understand high speed sync; give you a live studio shooting demo, and so much more! With any luck you’ll leave this class as amped as I am about light and shadow and chomping at the bit go out and put everything you’ve learned into practice.
If you’re like me, you may have found handheld flash intimidating at one point or another. Maybe you decided right then and there to leave well enough alone, put the flash down, and call yourself an “available light shooter.” Maybe you even have a speedlite or two sitting on your shelf collecting dust or languishing unused in your camera bag. Well guess what kids, your speedlites are “available lights.” In this new class I’ll strip away the fear and mystique surrounding these powerful tools, and flash in general, and give you the simple, straightforward info you need to get up and running with your new speedlites.
I’ll show you why the Canon 600EX-RT Speedlite and its companion ST-E3 controller represent a quantum leap forward in handheld flash technology. They have easy to use interfaces, easy to understand menus, and a first of its kind built-in radio based communication system. Simply said they just work! And there’s more good news, the 600EX-RT Speedlite and ST-E3 controller both share the same interface, so once you’ve learned one, you’ve essentially learned the other. Thank you Canon, we love that!!
It’s not just speedlites that can strike fear into the hearts of the burliest of men, but flash in general can have this effect too. So I’ll simplify that too! In a “teach a man to fish” approach, I’ll show you how to think about light and understand the why, when and how behind the choices you have available to you. Together we’ll look at the 4 key components that make up flash: quantity of light, quality of light, direction of light and distance of light. It doesn’t get more complicated that I promise, and after this class you’ll understand why. So come along with me on this journey of light and technology, things will never be the same!
I’ve included a selection of images I created with the Canon 600EX-RT system below to whet your appetite. I want to get you as excited as I am about this incredible system. In the captions for each image I’ve described the techniques I used, how they were lit, and why the 600EX-RT system was the perfect solution. See you guys in class!
First let’s start my two favorite, no fail, location lighting patterns, Cross Light and Wedge Light! These two lighting patterns are quick, easy, work every time, and form a solid foundation to build upon with additional techniques and light modifiers.
Cross Light is a simple but very effective lighting pattern that quickly adds a polished, sculptural, dimensional quality to your subjects. It’s created by aiming two speedlites at each other along the same axis and placing your subject between them. By doing this you’re creating a key light on one side and an accent light on the other. This arrangement can then be rotated around your subject so you can light them using either Broad Light or Short Light. Your bases are covered with this one simple pattern. You’ll see Cross Light used a lot in the images below, give it a try!
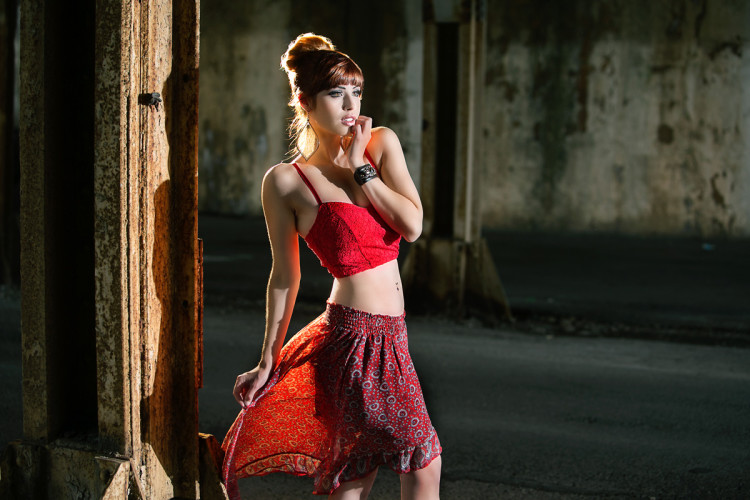
Here’s Cross Light in action! I’ve hidden one speedlite behind the gritty column camera left. This is my accent light. It’s been fitted with a half cut of CTO gel to create a warm tone and replicate the look of setting afternoon sun on my model’s hair. Like my key light placed camera right, both flash heads were vertically oriented and manually zoomed to 200mm. Doing this creates tight vertical beams of light that not only provide a natural looking in-camera fall-off of light but also more closely match the vertical shape of the body.
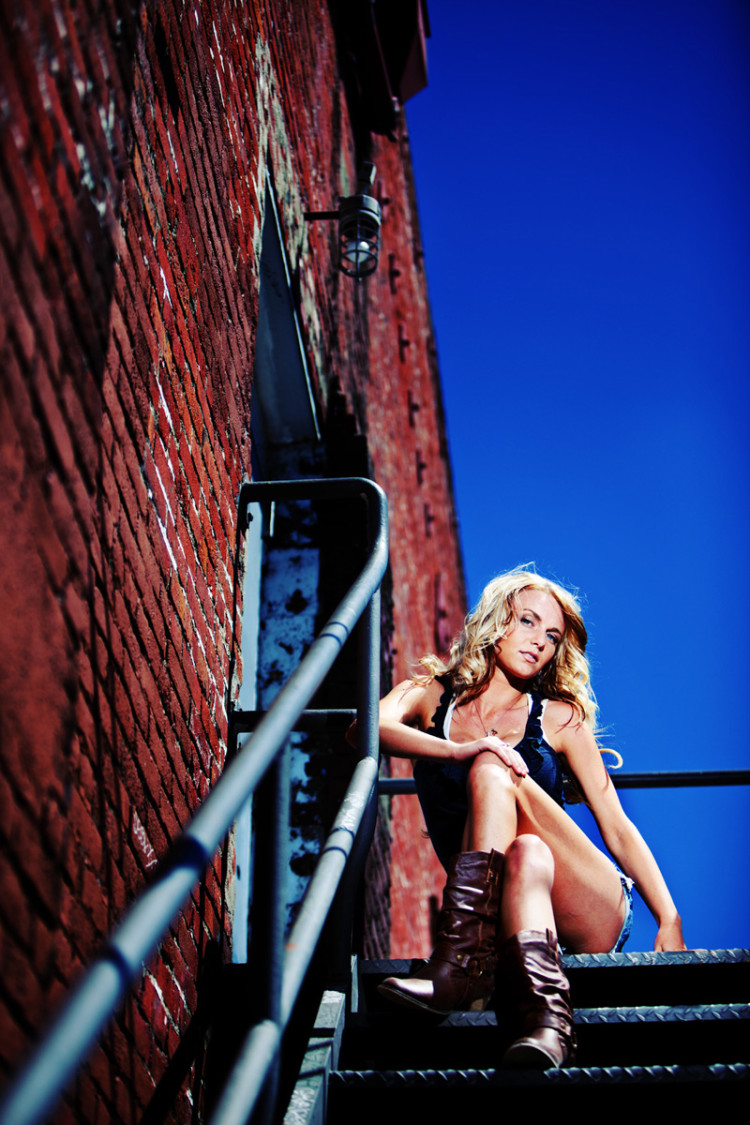
More fun with Cross Light. Here the key light is placed camera left and the accent light is over the model’s right shoulder providing a punchy highlight on her hair and shoulder. Bare speedlites, vertically oriented and zoomed to 200mm do the trick here delivering dramatic, specular light. I’ve underexposed the ambient by 2 stops using my shutter speed to get that killer blue sky! I explain this in detail in my class.
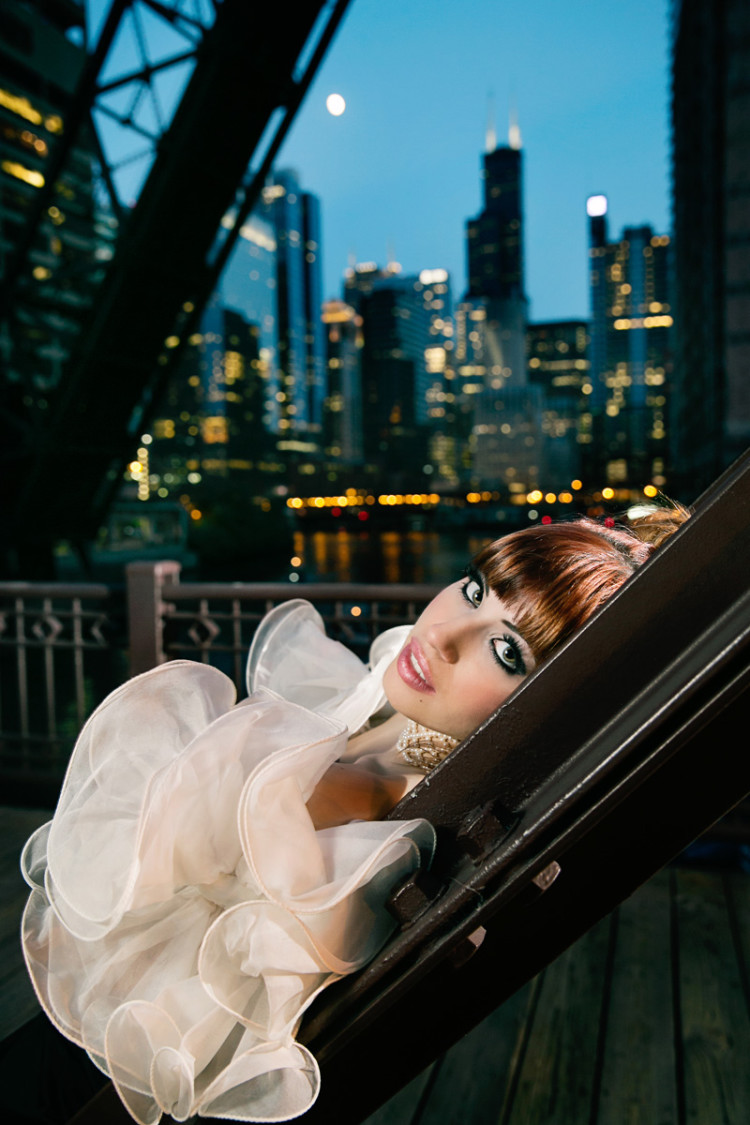
Just as I used my shutter speed in the image above to create one effect, in this image I’ve used it in another way to create a completely different look. Dragging the shutter (using a very slow shutter speed) along with a high ISO and Cross Light allow me to balance the beautiful shimmering lights of Chicago’s evening skyline and the strobe illuminating my model. The key light here is modified with a Chimera collapsible beauty dish and the accent light is bare flash with a 1/2 cut of CTO gel to warm things up a bit.
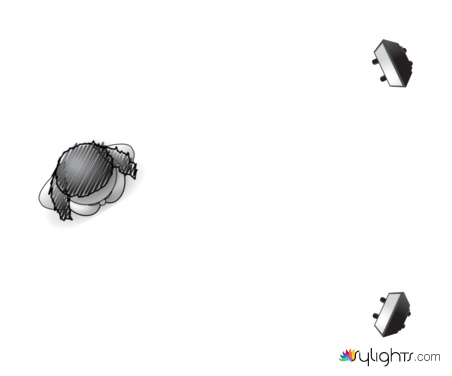
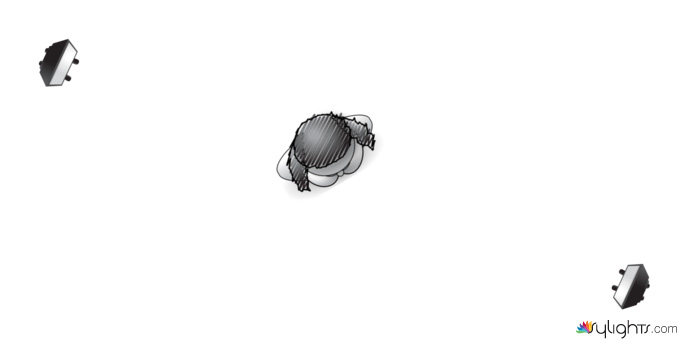
Next up is something I like to call Wedge Light. This is another super flexible and easy to use location lighting pattern. It gets its name due to the pie slice shape in which the key and accent lights are placed. Like Cross Light, this pattern can be rotated around your subject, in this case to introduce more or less shadow. The distance between each light can also be widened or shortened to create different effects.
Here you can see the results of Wedge Light positioned to the side, exactly like the diagram above, to create directional, shadowed, dramatic light. Both speedlites are bare bulb delivering a punchy, specular quality of light with rapid transitions between shadows and highlights.
In this image I’ve taken the same Wedge Light pattern used in the image above and positioned it in front of my model to create an even, almost shadowless lighting effect. Each speedlite is modified with a 24×24” Lastolite EzyBox Softbox and the harsh light from the midday sun overhead is being diffused with an 8×8’ scrim.
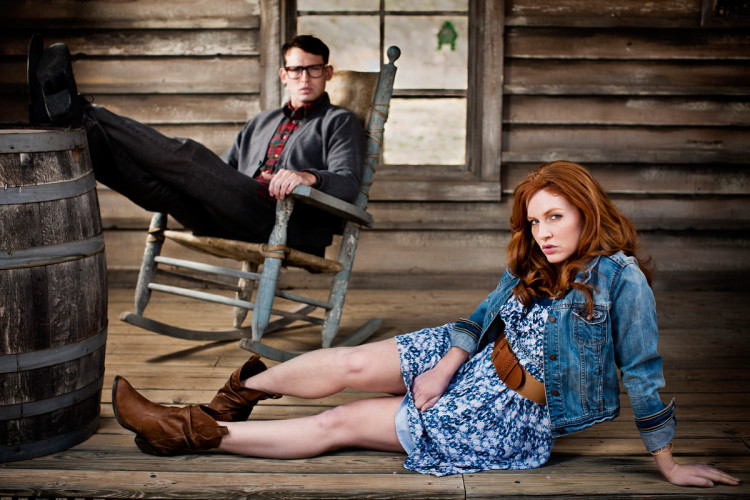
Wedge Light is also great for 2 people! Here I’ve got both speedlites camera left in a in pie slice arrangement, each inside a 24” Lastoilte Ezybox Softbox aimed toward each subject. I’ve also got an 8×8’ scrim overhead to diffuse the harsh sun above.
Now let’s talk about why you need speedlites with built-in wireless radio communication! The next two images demonstrate perfectly why the Canon 600EX-RT/ST-E3’s built-in radio communication is such a game changer. Optical based systems require something called “line of sight.” Meaning both the speedlite and controller need a clear visual path to see one another in order to communicate. When it comes to placing speedlites behind walls and inside soft boxes this line of sight is broken and communication is lost. Not so with radio based systems. Obstacles are no problem and the line of sight requirement is gone! Optical systems are also prone to problems in bright sunlight. In other words, radio rules.
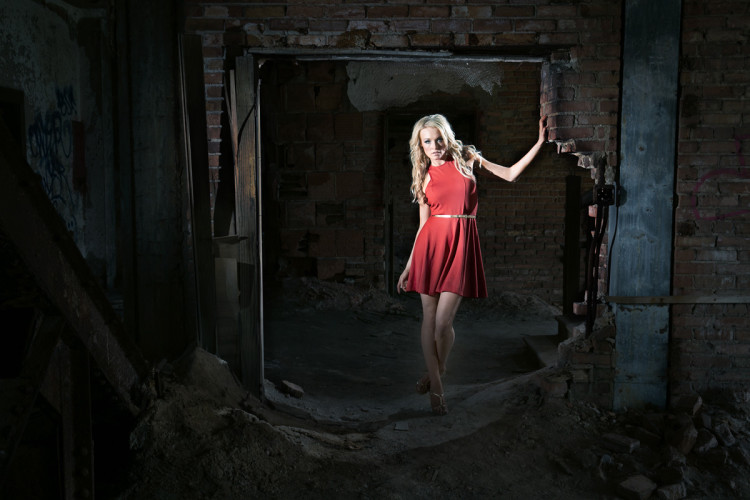
This image like the others was made using the 600EX-RT and ST-E3’s wireless radio based communication system. It’s a perfect example of radio’s superiority over optically based systems. Note the position of the accent lights in this Cross Light setup… It’s behind a wall camera right. There’s no line of sight between the controller on my camera and the speedlite behind the wall, if I were using an optical trigger system there would be no way to trigger the flash. Plus not only can I trigger hidden lights but I have full control over their power and exposure modes. This is all huge!
Here’s another practical example of the many ways radio based communication makes things much easier. Here I’ve got a speedlite inside a soft box placed camera right. Again the controller and speedlite have no line of site, so optical is out of the question. Additionally the speedlite is inside the softbox, meaning that without radio communication, every time I wanted to make a power adjustment I’d need to open the softbox and dig inside to get to the speedlite’s controls. Trust me, that gets to be no fun real quick! Again, radio rules.
Last but not least I’d like to talk about direction, direction of light! I’ll cover all of this in class, but I want to encourage you to start thinking about directionality. The more direction or angle at which you have your light in relationship to your subject, the more shadow you’ll introduce. For me shadow equals drama and mood; I’m a big fan. Think about it… At its essence photography is nothing more than highlights and shadows, so embrace them! Shadows can be infinitely controlled, using distance, source size, and the modifier used to control the speed of the transition from highlight to shadow.
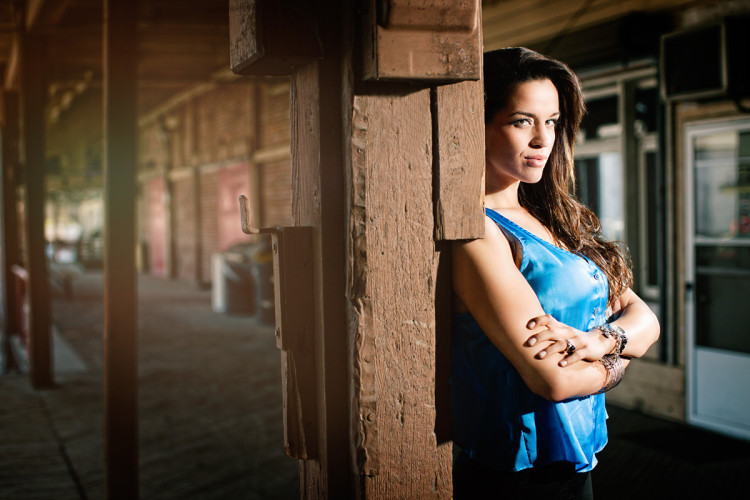
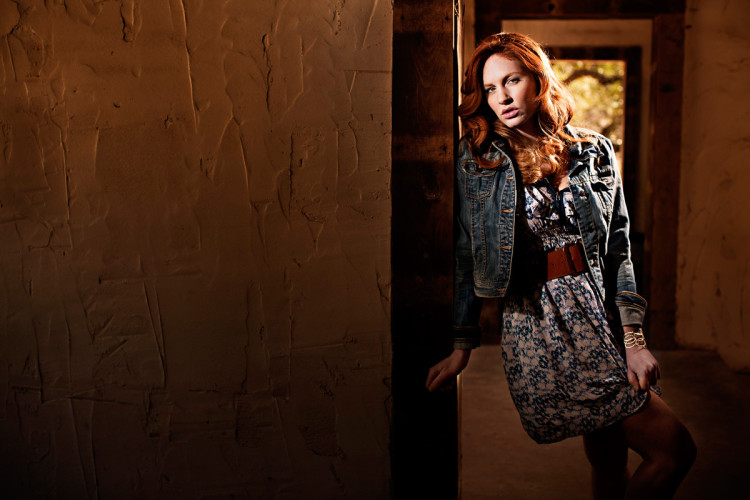
Placing my lights to the side of my model introduces shadow and drama. Think about how different this image would be if it were produced using flash on camera! Did somebody say flat? If you did you’d be right on target! Throw some direction into your lighting, you’ll be glad you did.
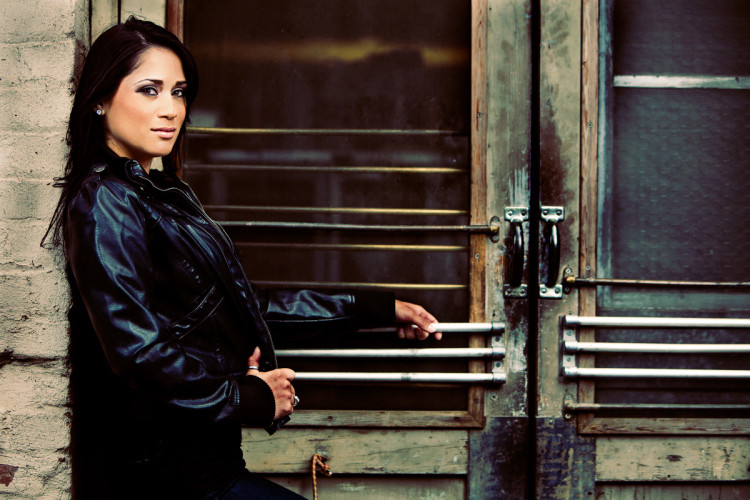
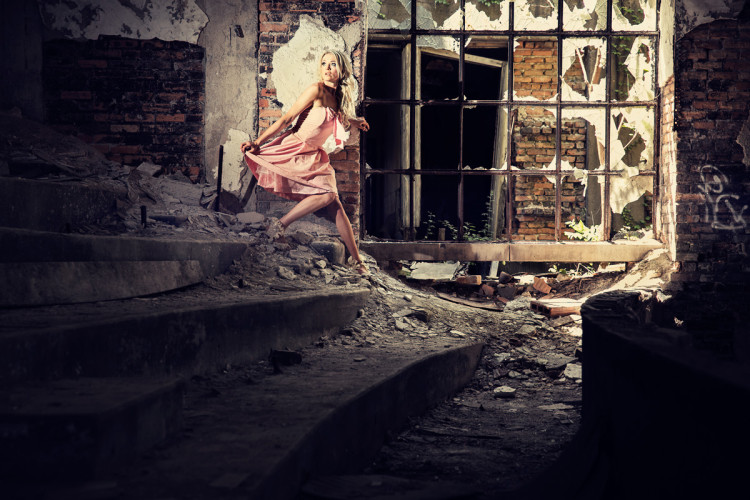
There’s nothing like a little side light when it comes to creating mood and drama. Here I’m using Cross Light Light again. My key light is a bare speedlite, camera left, and my accent light is another speedlite placed outside the widow camera right.
Clearly I’m passionate about light and I can’t wait to share what’s possible with Canon’s 600EX-RT and ST-E3 speedlite system! Hopefully the images above have stoked your creative fires and gotten you ready to dust off your speedlites and explore new ways to create with light. My class will be live tomorrow, I hope you’ll join me. Together we’ll get you all dialed in and up and running!
You can see more of Michael’s work at MichaelCorsentino.com, and follow him on Facebook, Twitter, and Instagram. And his new class Canon 600EX-RT Speedlite Basics will be available tomorrow at KelbyOne.com!
The post It’s Guest Blog Wednesday featuring Michael Corsentino! appeared first on Scott Kelby's Photoshop Insider.
from Scott Kelby's Photoshop Insider http://ift.tt/1XMvXIQ
via IFTTT


No comments:
Post a Comment