
Hey there! It’s me again, Dave Williams, which means it’s my favourite day of the week – #TravelTuesday – and that means I’m here, in your face, at Scott Kelby’s Photoshop Insider!
Right, if you were following along you’ll know that I jumped on my Triumph and spent nine days riding from London to the Atlantic Highway in Norway. 3,100+ miles if you’re asking. And guess what… I’m back! I’m still trawling through hours of footage to make a cool video to show you all, so keep an eye on my Facebook to see when that lands, but for today I’ve seen inspiration in the amazing sunny weather we’re having here in London and I want to share with you this amazing little trick!
So, you know when you shoot into the sun and you get that cool bright spot and a little lens flare? Well that’s what we’ll create here, so go ahead and choose a suitable shot or download mine right here.
(Use my shot for the tutorial, use it to show us how you get on with the tutorial, but sell it and I’ll find you!)
Let’s go!
First up, the prep. Open the shot into Adobe Photoshop, then duplicate the Layer with CMD + J (Windows CTRL + J) so we work non-destructively. Select the new Layer and follow along!
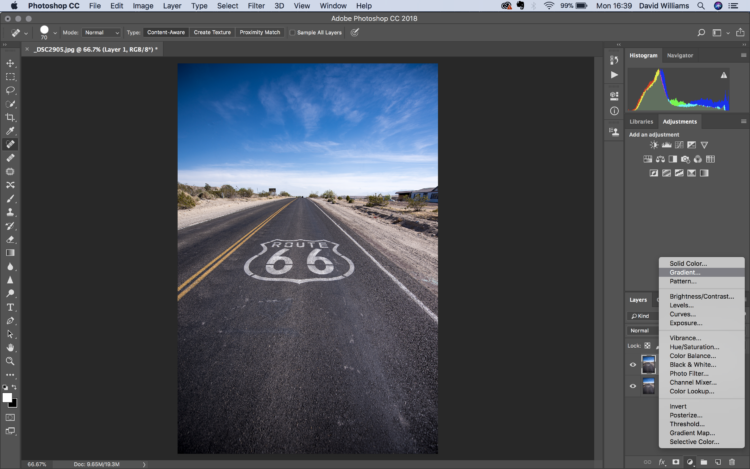
Down at the bottom of the Layers Panel select ‘Create New Fill Or Adjustment Layer.’ From the options there, choose Gradient.
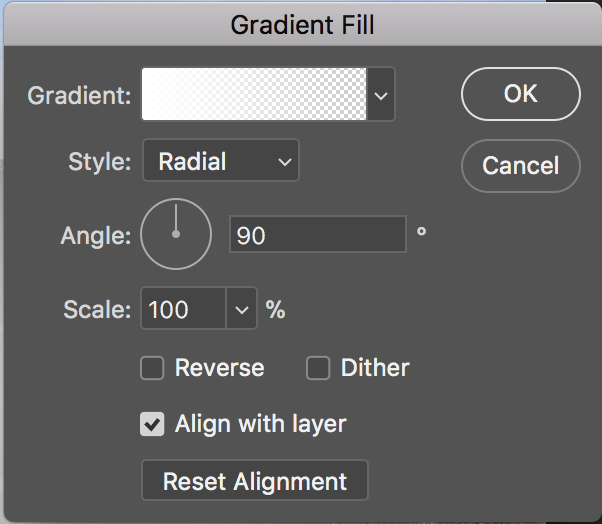
In the Dialogue Box, set the ‘Style’ option to Radial. When that’s done you can go ahead and move the Radial Gradient in the image behind the Dialogue Box by clicking and dragging it, setting it up at the spot you want it. Next up, click on the Gradient box and a new Dialogue will pop up.
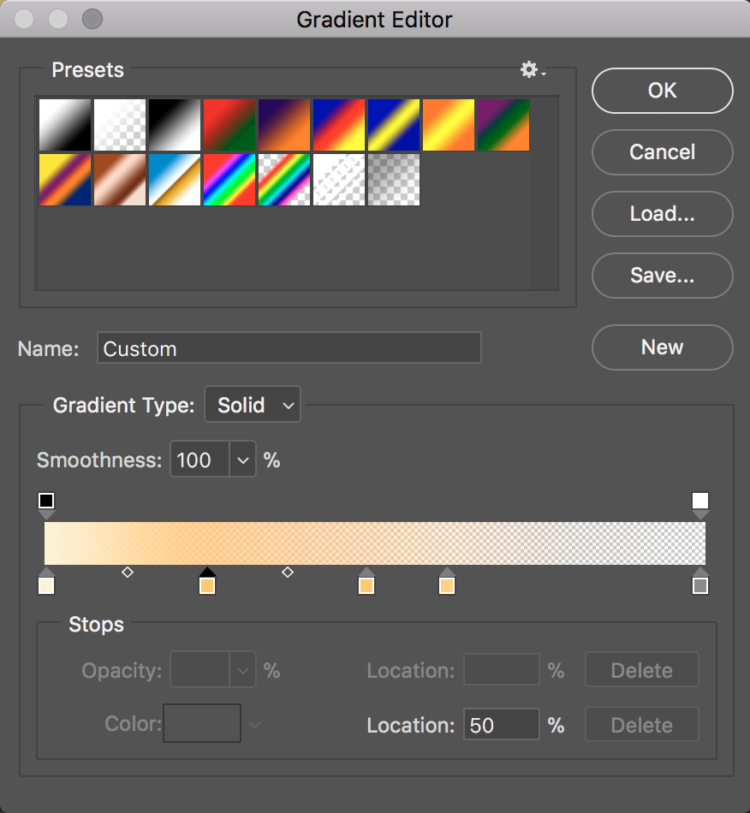
What we’ll do here is create a custom Gradient just like I’ve done. It’s tricky to explain in writing, so focus! To do this, first of all select the left Color Stop (the square at the bottom left of the bar) then from the Colour option set it to a Yellow that’s almost White. Now select the right Colour Stop and set it’s Colour to a mid-tone Grey.
So far so good, we’ve set the centre point to a very bright colour to emulate the sun and set the outer edges to a grey which will fade out. Now select the centre Colour Stop, or if you don’t have one just click in the centre and one will appear. Set this one to a very light Orange, then slide that Colour Stop towards the lower end of the bar. We’ll create two more Colour Stops to add some realism to what’s becoming or sun glare. We create them by clicking in the bar, and when we select the colours we stick with slightly different tones of yellow or orange. The result we need to achieve is that the spectrum of the Gradient is very bright at the centre, the left; then changes to a darker and more orange colour for the first third, then fades to more of a yellow or even peach colour throughout the next third and fading towards the right. Make sense? Thought so!
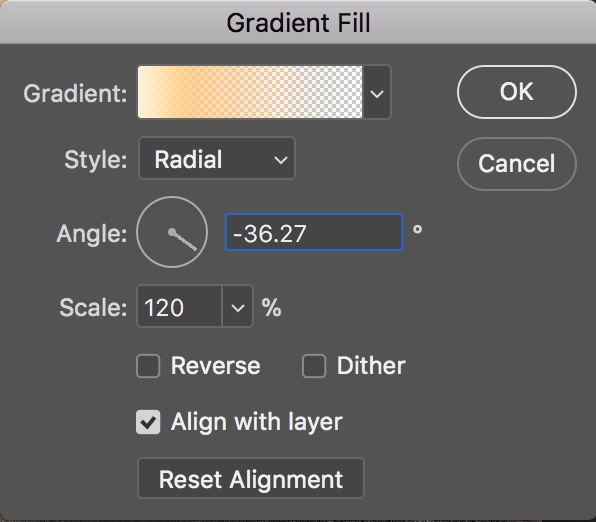
When we’re happy with the custom gradient we’ve made, hit OK and we’ll be taken back to the Gradient Fill Dialogue Box. In here we can change the angle to suit the position within our image, and we can make it larger or smaller with the Scale adjustment. I’ve pushed mine to 120% here. When you’re happy, hit OK.
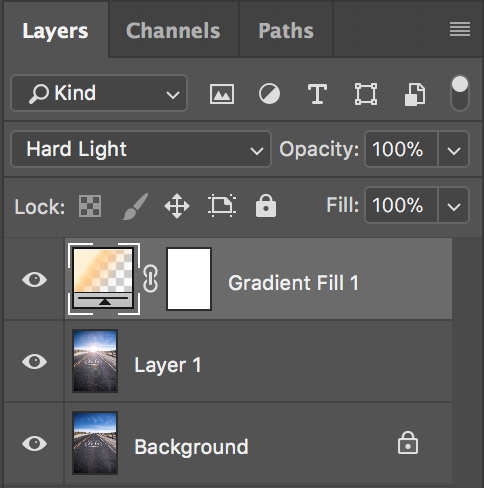
Now in the Layer Panel, change the Blend Mode to Hard Light.
So we’ve got the sun, the glow, but we’re missing something. We can step this up now by adding a Lens Flare so let’s go ahead and do that too!
Select Filter > Render > Lens Flare
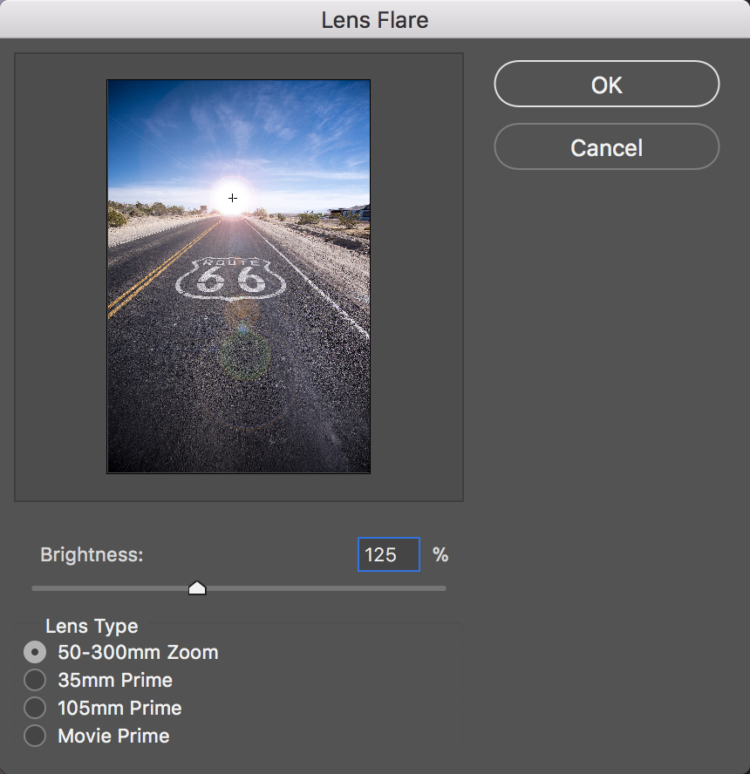
I find that the most effective Lens Type here is the 50-300mm Zoom so that’s what I’ve used but you can choose whichever suits your image. In the Preview Image, click at the centre of the sun, the Gradient Filter, and it will become much brighter and throw the lens flare across the image. From here we’re almost finished, we just need to adjust the brightness to suit the image. I’ve got mine at 125%, but set yours wherever it works and hit OK.
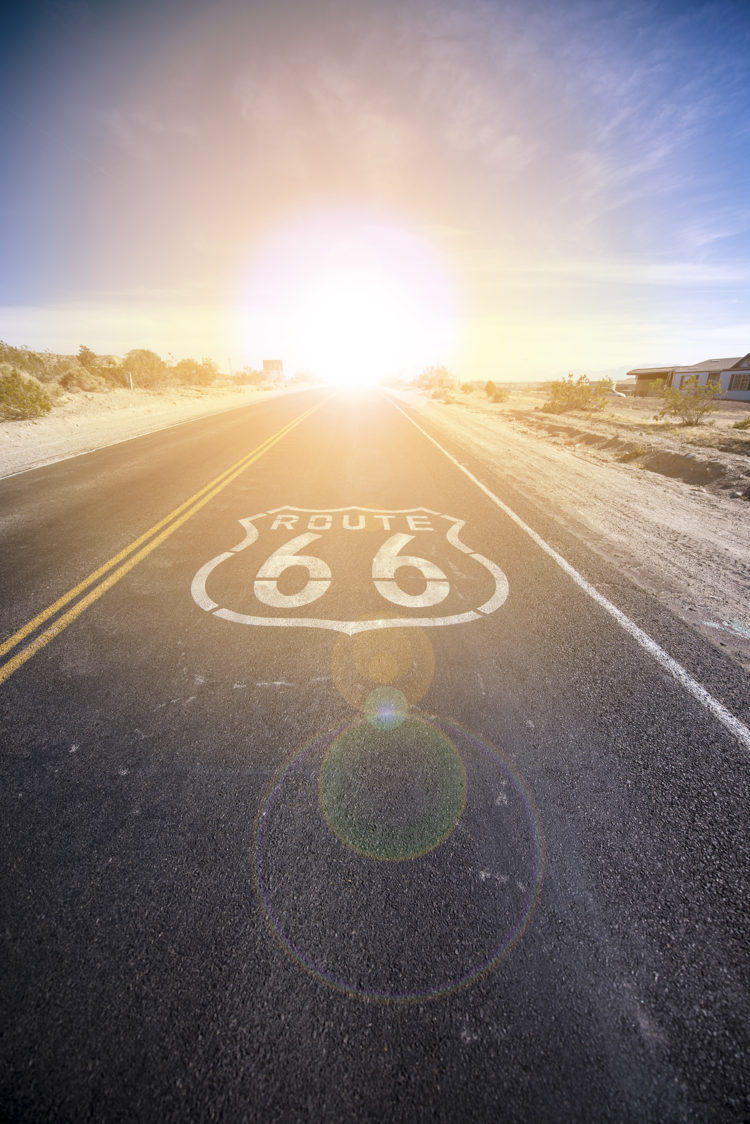
And we’re done! We’ve added a very dramatic, warm, and convincing glow of the sun to our image. I hope you like it! Show me how you get on by tagging @capturewithdave when you upload to Twitter or Instagram, and until next week…..
Much love
Dave
PS – Here’s a top secret Platypod tip. Don’t tell anyone!
The post Photoshop – straight into the sun appeared first on Scott Kelby's Photoshop Insider.
from Scott Kelby's Photoshop Insider https://ift.tt/2HZ1uJS
via IFTTT
No comments:
Post a Comment